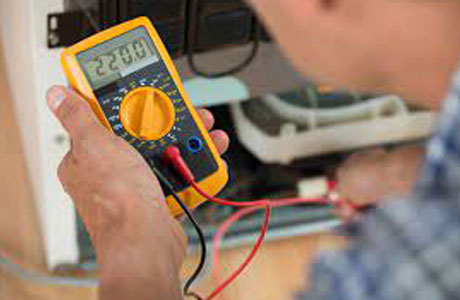
How To Use A Multimeter Step By Step?
Key Takeaway
Here’s a step-by-step guide to using a multimeter:
1. Prepare the circuit: Turn off the circuit or device and disconnect the power to ensure safety.
2. Set the multimeter: Select the correct setting on the dial, such as voltage (V), current (A), or resistance (Ω), and choose AC or DC based on your measurement.
3. Insert probes: Plug the black probe into the COM port and the red probe into the port labeled for the function you’re measuring.
4. Take measurements:
For voltage: Touch the probes to the circuit’s positive and negative terminals.
For resistance: Place the probes on either side of the component.
For current: Connect the multimeter in series with the circuit.
5. Check results: Read the display for accurate measurements. If testing continuity, a beep indicates the circuit is closed. Always follow safety precautions while using the multimeter.
Getting Started: Understanding Multimeter Components
Before diving into measurements, it’s important to familiarize yourself with the basic parts of a multimeter.
Key Components:
Display: Shows measurement results, typically as numeric values.
Dial/Selector: Used to choose the measurement type (voltage, current, resistance) and range.
Ports:
COM (Common): The black probe always connects here.
VΩ (Voltage/Resistance): The red probe connects here for most measurements.
mA or A (Current): For current measurements, the red probe connects to the appropriate port based on expected current.
Probes: Two insulated wires with metal tips for connecting the multimeter to the circuit.
Understanding these components ensures you’re ready to set up the multimeter correctly for different tests.
Understanding Multimeter Components H2: Setting Up the Multimeter for Different Measurements
Each measurement type requires specific settings on the multimeter.
Steps to Set Up:
Turn the Dial: Select the desired function (e.g., AC voltage, DC voltage, resistance, current).
Choose the Correct Range: If your multimeter isn’t auto-ranging, select a range higher than the expected value.
Insert the Probes:
Black probe into the COM port.
Red probe into the VΩ port for voltage/resistance or mA/A port for current.
Test the Multimeter: Before connecting to a circuit, touch the probe tips together to confirm continuity or zero readings.
Proper setup is critical for accurate results and protecting the multimeter from damage.
Setting Up the Multimeter for Different Measurements H2: Measuring Voltage, Current, and Resistance Safely
Measuring Voltage:
Set the dial to AC or DC voltage.
Insert the probes (black to COM, red to VΩ).
Place the probes in parallel with the component or circuit.
Read the voltage on the display.
Measuring Current:
Set the dial to the appropriate current range.
Insert the red probe into the mA or A port based on expected current.
Place the probes in series with the circuit.
Read the current value on the display.
Measuring Resistance:
Set the dial to resistance (Ω).
Ensure the circuit is powered off.
Place the probes across the component or circuit.
Read the resistance value.
Always double-check your settings and connections to prevent errors or accidents during these measurements.
Measuring Voltage, Current, and Resistance Safely H2: Tips for Using Continuity and Diode Testing Modes
Tips for Using Continuity and Diode Testing Modes
Continuity Testing:
Used to check if a circuit is complete.
Set the dial to continuity mode (symbolized by a soundwave).
Touch the probes together; a beep indicates continuity.
Place the probes across the circuit or component. If it beeps, the circuit is complete.
Diode Testing:
Used to check if a diode is functioning properly.
Set the dial to diode mode (triangle with a line).
Place the red probe on the anode and the black probe on the cathode.
A typical reading of 0.5–0.7V indicates a functioning diode; no reading means it’s faulty.
These specialized modes are invaluable for quick diagnostics and verifying component functionality.
Tips for Using Continuity and Diode Testing Modes H2: Common Troubleshooting Scenarios Using a Multimeter
Multimeters are essential for identifying faults in various scenarios.
Scenario 1: Checking a Faulty Outlet
Set the multimeter to AC voltage.
Insert the probes into the live and neutral slots of the outlet.
A normal reading indicates proper function; zero voltage may indicate a tripped breaker or disconnected wiring.
Scenario 2: Testing a Dead Battery
Set the multimeter to DC voltage.
Place the probes on the battery terminals (red to positive, black to negative).
Compare the reading to the battery’s rated voltage to determine if it needs replacement.
Scenario 3: Diagnosing a Broken Wire
Set the multimeter to continuity mode.
Place the probes at either end of the wire.
No beep indicates the wire is broken.
These troubleshooting techniques highlight the multimeter’s versatility in everyday electrical work.
Conclusion
Using a multimeter doesn’t have to be complicated. By understanding its components, setting it up correctly, and following safe measurement practices, you can confidently tackle a variety of electrical tasks. From measuring voltage and current to diagnosing broken circuits, a multimeter is an invaluable tool for both beginners and professionals.
With practice and adherence to these step-by-step instructions, you’ll master the art of using a multimeter, ensuring accurate results and safer work environments every time.