How To Troubleshoot A Faulty Temperature Gauge?
Key Takeaway
To troubleshoot a faulty temperature gauge, first check the power supply if it’s a digital model. Ensure the connections are secure and the battery is charged or replaced. For analog gauges, inspect the mechanical components, such as the dial and needle, for any visible damage or sticking.
Next, check the sensor to see if it’s properly installed and not obstructed. If the gauge still doesn’t work properly, compare the readings with another reliable thermometer or gauge. If discrepancies persist, the gauge may need recalibration or replacement.
Introduction to Temperature Gauge Troubleshooting
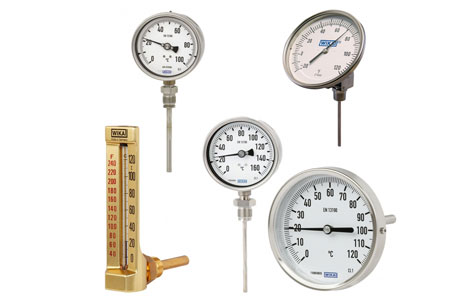
Temperature gauges, whether digital or analog, are designed to provide accurate temperature measurements that guide operational processes. However, various factors can cause a gauge to malfunction, including mechanical damage, calibration errors, environmental factors, or electrical issues.
When you notice that a temperature gauge isn’t providing the correct readings, it’s essential to troubleshoot it systematically. By following a clear troubleshooting process, you can often resolve the issue without the need for costly repairs or replacements. Troubleshooting helps identify whether the gauge requires calibration, maintenance, or a full replacement, ensuring continued reliability in your systems.
Effective troubleshooting involves understanding the potential causes of malfunction and applying appropriate techniques to address them. Having the right tools and a methodical approach can significantly improve the chances of restoring a faulty temperature gauge to its proper working condition.
Identifying Common Problems
Before starting the troubleshooting process, it’s crucial to understand the common issues that may affect temperature gauges. Some of the most frequent problems include:
1. Inaccurate Readings: If your gauge is consistently reading higher or lower than expected, it might be out of calibration or experiencing a sensor issue.
2. Erratic Readings: Fluctuating or inconsistent readings could indicate loose connections, electrical interference, or a faulty sensor.
3. Frozen Display or Stuck Needle: In digital temperature gauges, a frozen display suggests an electrical or display problem, while a stuck needle in analog gauges typically signals mechanical damage.
4. Slow Response Time: If the gauge takes too long to reflect temperature changes, there may be issues with the sensor’s responsiveness or internal circuitry.
5. Complete Failure to Display Data: If the gauge shows no reading or is completely blank, there could be a power supply issue or internal malfunction.
Once you have identified these common problems, you can proceed to diagnose and fix them. Often, these issues are caused by minor faults that can be resolved with simple troubleshooting steps.
Tools for Troubleshooting
To effectively troubleshoot a temperature gauge, you’ll need a few essential tools to help diagnose and repair the issue. Here are the most commonly used tools:
1. Multimeter: A multimeter is crucial for testing electrical connections and checking for power issues in digital gauges.
2. Calibration Tools: You may need a reference thermometer and calibration kit to test and recalibrate the gauge.
3. Screwdriver/Allen Wrench: For mechanical analog gauges, you’ll need these tools to open the casing and access the internal components for inspection.
4. Contact Cleaner: If corrosion or dirt has affected the gauge, using a contact cleaner can help restore functionality by removing debris or rust from electrical contacts.
5. Replacement Parts (if necessary): Depending on the identified issue, you may need to replace certain components, such as sensors, wiring, or the display unit.
Having the right tools on hand will make the troubleshooting process smoother and more effective, allowing you to fix the temperature gauge in the most efficient way possible.
Step-by-Step Troubleshooting Process
Follow this step-by-step process to troubleshoot a faulty temperature gauge:
1. Check the Power Source: Ensure that the temperature gauge is receiving power. For digital gauges, check the power supply and battery if applicable. For mechanical gauges, verify that the device is properly connected to the system.
2. Inspect for Physical Damage: Look for any visible signs of damage, such as cracks, broken components, or loose connections. If the gauge has suffered physical damage, it may need to be repaired or replaced.
3. Test Calibration: If the gauge is reading inaccurately, it may be out of calibration. Use a reference thermometer or another calibrated device to check the accuracy of the gauge. If the readings differ significantly, recalibrate the device following the manufacturer’s instructions.
4. Check for Electrical Interference: For digital gauges, electrical interference can cause erratic readings. Ensure that the gauge is not exposed to strong electromagnetic fields or sources of electrical noise. If needed, relocate the gauge or use shielding to protect it from interference.
5. Examine the Sensor or Probe: The sensor is a key component in both digital and analog gauges. Check the sensor or probe for signs of wear, corrosion, or blockage. If the sensor is damaged, it may need to be replaced.
6. Assess the Internal Circuitry: If the display is not working or the gauge is not responding, the internal circuitry might be faulty. Use a multimeter to check for broken connections, faulty components, or damaged wiring.
7. Perform a Functional Test: Once you’ve addressed the identified issues, perform a functional test by subjecting the gauge to a known temperature and checking if the readings align with the expected values. If the gauge responds accurately, the troubleshooting process is complete.
When to Replace a Faulty Gauge
In some cases, troubleshooting may reveal that the temperature gauge is beyond repair or is too costly to fix. Here are a few scenarios when replacement is necessary:
1. Severe Mechanical Damage: If the temperature gauge has suffered extensive mechanical damage, such as a cracked display or a bent needle that cannot be fixed, replacement may be the most cost-effective option.
2. Irreparable Sensor Damage: If the sensor is damaged beyond repair or the cost of replacement exceeds that of a new gauge, it may be time to replace the entire unit.
3. Persistent Calibration Issues: If the gauge continually fails to calibrate correctly despite multiple attempts, it may indicate a deeper internal issue that cannot be resolved through simple troubleshooting.
4. Old and Outdated Models: If the temperature gauge is old and lacks modern features or compatibility with current systems, replacing it with a more advanced, accurate model could provide better long-term value.
In such cases, it’s essential to select a new gauge that meets the required specifications for your system and offers improved reliability and performance.
Conclusion
In conclusion, troubleshooting a faulty temperature gauge requires a methodical approach to identify and resolve underlying issues. Begin by checking the gauge’s electrical connections and wiring for any signs of damage or disconnection. Next, inspect the sensor to ensure it is functioning correctly and providing accurate readings. Calibration errors should also be considered as potential culprits.
By systematically addressing these potential causes, users can restore the temperature gauge to its optimal performance. Regular maintenance and timely troubleshooting are essential to prevent long-term damage and ensure the reliability of temperature measurements. Ultimately, a proactive approach to troubleshooting can lead to enhanced safety and efficiency in systems that depend on accurate temperature monitoring.