How To Test A Pressure Switch?
Key Takeaway
Testing a pressure switch involves checking its electrical and pressure functionality. Turn off the power and use a multimeter to check if the switch opens and closes correctly.
Then, connect a pressure gauge to ensure it activates at the set pressure levels. If it doesn’t respond accurately, it might need replacement.
Importance of Testing a Pressure Switch
Testing a pressure switch is a critical process in ensuring the safety and efficiency of systems that rely on pressure control. Pressure switches are used in a variety of applications, from industrial machinery to household appliances. They play a vital role in maintaining desired pressure levels by triggering actions when set thresholds are reached.
Regular testing of pressure switches helps in identifying potential faults before they lead to system failures. It ensures that the switch performs accurately and reliably under different conditions. By understanding the importance of testing, industries can prevent costly downtime and maintain optimal performance. This process not only promotes safety but also extends the lifespan of the equipment involved.
Equipment Required for Testing
To test a pressure switch effectively, you’ll need the following tools:
1. Multimeter: A multimeter is essential for checking the electrical continuity and resistance of the pressure switch. It helps verify whether the electrical components are functioning correctly.
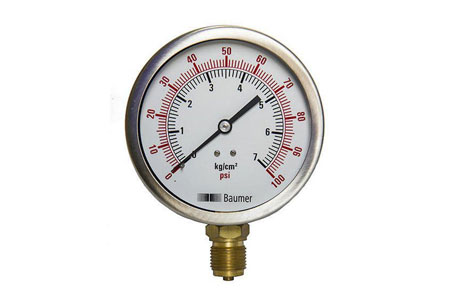
2. Pressure Gauge: A pressure gauge allows you to measure the actual pressure in the system and compare it with the pressure at which the switch is supposed to activate or deactivate.
3. Test Pump or Air Supply: This is used to simulate pressure changes during the test. You can increase or decrease pressure to observe how the switch reacts.
4. Wrench or Screwdriver: You’ll need these to remove or adjust the pressure switch if necessary.
5. Safety Gear: Protective gloves and safety goggles are crucial to avoid injury during testing, especially if there’s a risk of high-pressure releases.
Having these tools on hand ensures that you can perform the test accurately and safely.
Step-by-Step Testing Procedure
Testing a pressure switch requires following a clear, systematic procedure. Here’s how you can test a pressure switch effectively:
1. Disconnect Power: Safety first! Disconnect the power supply to the system before performing any testing to avoid electrical hazards.
2. Remove the Pressure Switch: If needed, use a wrench or screwdriver to remove the pressure switch from the system. Ensure there are no leaks in the surrounding connections before continuing.
3. Connect the Pressure Gauge: Attach a pressure gauge to the system, ensuring it reads the actual pressure in the line. Compare this value with the setpoint of the pressure switch.
4. Simulate Pressure Changes: Use a test pump or air supply to increase or decrease the pressure in the system. While doing this, observe the pressure switch to see if it activates and deactivates at the correct setpoints.
5. Test Electrical Continuity: Use a multimeter to check the electrical continuity of the switch when the pressure reaches its activation point. Ensure that the circuit closes or opens as expected.
6. Check for Leaks: During testing, check for any signs of leakage around the switch, which could indicate a faulty seal or connection.
This step-by-step procedure ensures that you test the switch thoroughly and accurately, helping identify any issues that may require attention.
Identifying Faulty Components
During the testing process, you may encounter faulty components that affect the pressure switch’s performance. Here are a few common issues to watch for:
1. Worn Contacts: If the internal contacts of the switch are worn or damaged, the switch may fail to activate or deactivate at the correct pressure levels. You can identify this by testing electrical continuity and noting any inconsistencies.
2. Faulty Diaphragm or Piston: The diaphragm or piston inside the switch is responsible for sensing pressure changes. If these components are damaged or stiff, they may not respond accurately to pressure fluctuations.
3. Corroded or Dirty Terminals: Corrosion or dirt on the terminals can cause poor electrical connections, leading to erratic switch behavior. A visual inspection and cleaning can help resolve this issue.
4. Leaking Seals: If you detect any leaks during the pressure test, it could indicate a damaged seal around the switch. Leaking seals can cause the system to operate at incorrect pressure levels, compromising safety and efficiency.
5. Incorrect Setpoints: If the switch fails to activate or deactivate at the correct pressure, the setpoints may need to be adjusted. Incorrect setpoints could result from wear or incorrect installation.
Identifying these issues early during testing allows for quick fixes, ensuring the pressure switch works efficiently.
Post-Test Calibration Recommendations
After testing the pressure switch, calibration may be required to ensure its accuracy. Calibration ensures that the switch activates and deactivates at the correct setpoint pressures, maintaining optimal system performance. Here’s how to calibrate the pressure switch after testing:
1. Adjust Setpoints: If the switch activates or deactivates at incorrect pressure levels, adjust the setpoints. This may involve turning a screw or using a dial on the switch to fine-tune the activation points.
2. Check Calibration with a Pressure Gauge: After making adjustments, use a pressure gauge to verify that the switch operates correctly at the desired pressure levels.
3. Test for Consistency: Run the test again, simulating pressure changes, to ensure the switch consistently activates and deactivates at the right pressures.
4. Ensure Proper Sealing: Check all seals and gaskets to ensure there are no leaks. If there are any signs of leakage, replace the seals before re-testing the switch.
Post-test calibration ensures that the pressure switch continues to function reliably and meets the required specifications, improving system safety and efficiency.
Conclusion
Testing a pressure switch is essential to ensure its proper functionality and reliability in a system. The process usually involves simulating pressure conditions to observe the switch’s response. Begin by disconnecting power to the switch for safety, then connect a pressure source and gauge to the switch’s input.
Gradually apply pressure while observing the switch’s action. The switch should activate or deactivate at its set pressure points. If the switch fails to respond correctly, it may require calibration or replacement. Regular testing helps maintain system efficiency and safety by ensuring that pressure switches operate within their specified parameters.