How To Test A Capacitor With A Multimeter?
Key Takeaway
To test a capacitor with a multimeter, follow these steps:
First, turn off the power and safely discharge the capacitor using a resistor to avoid damage. Set your multimeter to the capacitance mode (indicated by a symbol resembling two parallel lines). If your multimeter doesn’t have this mode, use the resistance setting. Remove the capacitor from the circuit to ensure accurate measurements.
Connect the multimeter probes to the capacitor terminals—red to positive and black to negative. For capacitance mode, the multimeter will display the capacitance value in microfarads. Compare this reading with the value printed on the capacitor. If it’s within 10-20% of the specified value, the capacitor is good. For resistance mode, the multimeter will initially show low resistance, which gradually increases as the capacitor charges. This indicates the capacitor is functioning. If there’s no change or the reading stays at zero, the capacitor is faulty.
Identifying the Capacitor Type and Rating Before Testing
Before you test a capacitor, it’s essential to identify its type and specifications. This step ensures you know what to expect from your measurements.
1. Check the Label: Most capacitors have their capacitance and voltage ratings printed on their body. For instance, you might see “100µF, 25V,” indicating a capacitance of 100 microfarads and a maximum working voltage of 25 volts.
2. Determine the Type: Capacitors come in various types, such as electrolytic, ceramic, and film. Electrolytic capacitors are polarized, meaning they have a positive and a negative terminal. Non-polarized capacitors, like ceramic or film types, can be connected in any orientation.
3. Understand the Circuit Role: Identifying the capacitor’s function in the circuit can provide context for the readings. For example, a filter capacitor in a power supply will behave differently than a coupling capacitor in an audio circuit.
Knowing the capacitor type and rating ensures you use the correct testing methods and interpret the results accurately.
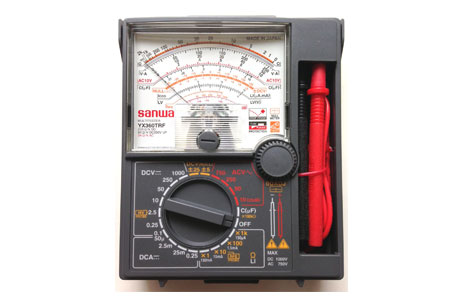
Switching Your Multimeter to Capacitance Mode
Testing a capacitor’s capacitance requires setting your multimeter to the correct mode.
1. Locate Capacitance Mode: On most digital multimeters, capacitance mode is marked with a symbol resembling two parallel lines (representing a capacitor). Rotate the dial to this setting.
2. Prepare the Probes: Insert the black probe into the COM terminal and the red probe into the terminal labeled with the capacitance symbol. This setup ensures accurate measurements.
3. Understand Range Limits: Some multimeters have limits on the capacitance they can measure. For instance, a basic multimeter might only measure up to 10,000µF. If your capacitor exceeds this range, you’ll need a specialized meter.
4. Verify Calibration: If your multimeter has a calibration function, use it to zero the reading before testing. This step removes any residual offset from the probes.
Switching to capacitance mode prepares your multimeter to deliver precise results during testing.
Discharging the Capacitor for Accurate Measurement
A charged capacitor can pose safety risks and affect test accuracy, making discharge a critical step.
1. Why Discharge? Capacitors store electrical energy, which can damage your multimeter or cause a shock if not discharged. Even small capacitors can hold significant charge.
2. Discharge Safely: Use a resistor (e.g., 1kΩ, 5W) to discharge the capacitor. Connect the resistor across the capacitor’s terminals, allowing it to safely release its stored energy over a few seconds. Avoid discharging by directly shorting the terminals, as this can damage the capacitor.
3. Confirm Discharge: After discharging, use your multimeter in voltage mode to ensure there’s no remaining charge. A reading close to 0V indicates the capacitor is safe to handle.
4. Handle with Care: Large capacitors, especially those in power supplies, can store lethal amounts of energy. Always wear insulated gloves and handle with caution.
Discharging a capacitor is non-negotiable for safe and accurate measurements.
Testing for Capacitance and ESR (Equivalent Series Resistance)
With the capacitor discharged and the multimeter set to capacitance mode, you’re ready to measure.
1. Measuring Capacitance: Connect the probes to the capacitor’s terminals. For polarized capacitors, ensure the red probe touches the positive terminal and the black probe touches the negative. For non-polarized capacitors, orientation doesn’t matter.
Observe the displayed reading. Compare this value to the capacitor’s rated capacitance. A significant deviation indicates a fault. For instance, if a 100µF capacitor reads 20µF, it’s likely degraded or damaged.
2. Checking ESR: Equivalent series resistance (ESR) represents the internal resistance of a capacitor. High ESR values indicate the capacitor is failing, even if the capacitance seems normal. While some multimeters include an ESR function, you might need a dedicated ESR meter for detailed analysis.
3. Analyze Results: Both capacitance and ESR readings are crucial for assessing capacitor health. A capacitor with a low ESR and a capacitance close to its rating is generally in good condition.
Testing these parameters ensures you identify faulty capacitors accurately and efficiently.
Troubleshooting Faulty Capacitors Based on Test Results
Interpreting test results helps you decide whether a capacitor needs replacement.
1. Low Capacitance: If the measured capacitance is significantly lower than the rating, the capacitor is likely degraded. Replace it to restore circuit functionality.
2. High ESR: Elevated ESR suggests internal wear, often due to aging or overheating. Even if capacitance is within range, high ESR can impair circuit performance.
3. Open Circuit: If the multimeter displays “OL” (open loop), the capacitor is likely open and not storing charge. This usually indicates a complete failure.
4. Short Circuit: A reading close to 0Ω in resistance mode suggests a shorted capacitor. This can cause circuit malfunctions or damage other components.
5. Physical Signs: Bulging, leakage, or burn marks are visual indicators of failure. Always replace capacitors showing these signs, regardless of test results.
Troubleshooting faulty capacitors based on these findings ensures efficient repairs and reliable circuit operation.
Conclusion
Testing capacitors with a multimeter is a simple yet crucial step in diagnosing circuit issues. By identifying the capacitor type, safely discharging it, and testing for capacitance and ESR, you can determine its health and functionality. Understanding how to troubleshoot based on test results helps maintain and restore optimal circuit performance, making this skill essential for any engineer or technician.