How To Measure Battery Health Using A Multimeter?
Key Takeaway
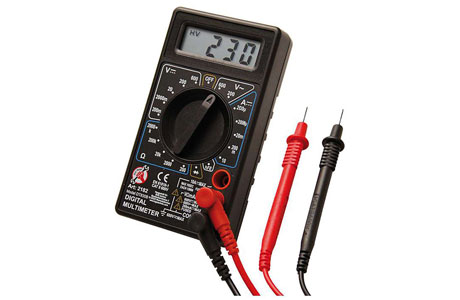
To measure battery health using a multimeter, first set the dial to DC voltage mode and choose a range slightly higher than the battery’s voltage. Attach the red probe to the positive terminal and the black probe to the negative terminal. Ensure the connections are secure.
Read the voltage on the multimeter display and compare it with the battery’s rated voltage. For a 12V car battery, a healthy reading is 12.6-12.8 volts. If it’s 12.4-12.6 volts, the battery is about 75% charged. When starting the car, the voltage should not drop below 10 volts. For smaller batteries, like a 9V, a reading above 7 volts indicates good health, while below 2.7 volts, the battery is considered dead. Consistently low readings suggest the battery needs replacement.
Why Measuring Battery Health Is Important
A battery’s performance doesn’t just depend on its age; environmental factors, usage patterns, and charging habits all play a role in its longevity. Testing battery health is essential for several reasons:
Key Benefits:
Identify Weak Batteries: Prevent unexpected failures in critical applications by diagnosing underperforming batteries early.
Optimize Performance: Regular checks ensure batteries operate at peak efficiency, especially in demanding environments.
Cost Savings: Detecting issues early allows for timely replacements, reducing damage to connected devices.
Common Signs of Battery Issues:
Devices shutting off prematurely.
Slower performance or dimmer displays in battery-powered gadgets.
Inconsistent charging cycles or excessive heat during charging.
Understanding the importance of battery health highlights why using a multimeter for regular testing is a valuable practice.
Preparing Your Multimeter for Battery Testing
To ensure accurate results, setting up your multimeter correctly is crucial.
Steps to Prepare:
Set the Multimeter to DC Voltage Mode: Most batteries supply direct current, so select the appropriate range for the battery you’re testing (e.g., 0-20V for a 12V car battery).
Insert the Probes:
Black probe into the COM port.
Red probe into the VΩ port.
Check the Multimeter: Test it on a known power source, such as a fresh battery, to verify functionality.
Safety Precautions:
Wear gloves when handling larger batteries, like car or industrial batteries.
Ensure the battery is disconnected from the device before testing to avoid interference.
By setting up your multimeter correctly, you minimize errors and ensure reliable readings during the testing process.
How to Measure Open Circuit Voltage of a Battery
The open circuit voltage (OCV) test measures the battery’s voltage without any load, giving a quick indication of its state of charge.
Steps for OCV Testing:
Prepare the Battery: Disconnect the battery from any device or circuit.
Set the Multimeter: Ensure it’s in DC voltage mode.
Place the Probes:
Touch the black probe to the negative terminal (-).
Touch the red probe to the positive terminal (+).
Read the Display: Compare the voltage reading to the battery’s rated voltage.
Interpreting the Results:
A fully charged 12V battery should read between 12.6V and 12.8V.
Readings below 12.4V indicate partial discharge, while anything below 11.8V suggests the battery may need replacement.
The OCV test provides a snapshot of the battery’s charge level but doesn’t account for performance under load, which is where the next test comes in.
Testing Battery Load Performance with a Multimeter
A load test simulates real-world conditions by checking how the battery performs when supplying power to a device or circuit.
Steps for Load Testing:
Reconnect the Battery: Connect it to the device or circuit it powers.
Set the Multimeter: Keep it in DC voltage mode.
Test Under Load:
Place the probes on the battery terminals as before.
Operate the device or circuit while monitoring the voltage reading.
What to Look For:
Minimal Voltage Drop: A healthy battery will maintain most of its voltage under load. For example, a 12V battery should stay above 11V during operation.
Significant Voltage Drop: A drop below 10V during load indicates the battery struggles to supply power and may need replacement.
Load testing offers a realistic view of the battery’s health, especially when combined with OCV testing.
Interpreting the Results and Signs of Battery Wear
The results from OCV and load tests provide valuable insights into the battery’s condition.
Signs of a Healthy Battery:
Voltage near the rated value during OCV testing.
Minimal voltage drop under load.
Consistent performance across multiple tests.
Indicators of Battery Wear:
Low OCV Readings: Suggest a loss of charge capacity due to age or damage.
Significant Voltage Drops: Point to internal resistance or chemical degradation.
Inconsistent Performance: Fluctuations in readings may indicate a failing cell.
Next Steps:
For marginally degraded batteries, consider recharging and retesting.
Replace batteries showing consistent signs of wear to avoid device failures.
By interpreting the results accurately, you can make informed decisions about battery replacement or continued use.
Conclusion
Measuring battery health with a multimeter is a straightforward yet powerful way to ensure the reliability of your devices and systems. From checking open circuit voltage to testing load performance, a multimeter provides valuable insights into a battery’s condition.
For engineers and technicians, regular battery testing is a simple habit that prevents unexpected failures, saves costs, and optimizes performance. By following the steps outlined here, you’ll gain confidence in assessing battery health and maintaining the efficiency of your equipment.