How To Install A Solenoid?
Key Takeaway
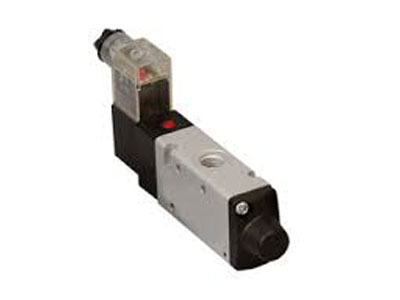
To install a solenoid valve, start by ensuring that the valve is properly sized for the application. The solenoid valve should be installed with the coil facing upwards, typically at a 90-degree angle to the valve body. This orientation helps to prevent any debris or buildup from interfering with the valve’s operation.
Before installation, ensure the power supply is turned off, and disconnect the system. Connect the valve to the pipework, ensuring the flow direction matches the arrow on the valve body. Tighten the connections properly to avoid leaks. Once installed, reconnect the power, test the solenoid valve by energizing it, and verify that it opens and closes as expected. Regular maintenance and inspection can help ensure long-term performance.
Pre-Installation Checklist and Required Tools
Before installing a solenoid valve, it’s important to prepare. A checklist ensures that everything is in order for a successful installation. Here’s what you should verify:
1. Solenoid Valve Specifications: Ensure that the solenoid valve is compatible with the system’s requirements in terms of size, pressure, and flow. Always refer to the manufacturer’s guidelines to confirm this.
2. Power Supply: Check that the power supply voltage is correct for the solenoid valve you are installing. Some valves require AC power, while others may use DC.
3. Environment Considerations: Make sure the installation area is clean and free of debris. Solenoid valves should be placed where they won’t be exposed to excessive moisture, heat, or chemicals that could damage the valve over time.
4. Tools Needed:
Wrenches or Socket Set: For connecting the solenoid valve to the pipeline or system.
Screwdriver: For securing electrical terminals.
Multimeter: To test electrical continuity and ensure proper wiring.
Thread Sealant or Tape: To prevent leaks at threaded connections.
Protective Gloves and Goggles: For safety while working with electrical and mechanical parts.
5. Pipe and Valve Inspection: Inspect both the solenoid valve and the connected pipes for any signs of damage or dirt. Clean if necessary.
By confirming these items before starting the installation, you can save time and avoid complications during the process.
Proper Positioning and Orientation of the Valve
Correct positioning and orientation of the solenoid valve are essential for its proper function. Misalignment can cause inefficiency, leaks, or even system failure. Here’s what to consider:
1. Valve Orientation: The solenoid valve should be installed according to the direction of flow indicated on the valve body. Most valves have arrows showing the direction of flow, and installing them incorrectly can prevent the valve from working.
2. Horizontal vs. Vertical Mounting: Solenoid valves can be mounted in both horizontal and vertical orientations, but it’s important to check the manufacturer’s recommendations. In some cases, specific orientations are required to ensure proper functioning and longevity.
3. Accessibility: Position the solenoid valve where it’s easily accessible for future maintenance, repair, or testing. Tight, hard-to-reach spaces can complicate future work.
4. Environmental Protection: If the valve is to be installed outdoors or in a wet environment, make sure it is protected from the elements. Consider using weatherproof covers or placing it inside a protective enclosure.
5. Distance from Heat Sources: Avoid installing solenoid valves near heat sources or high-temperature zones, as extreme temperatures can damage internal components or reduce the valve’s lifespan.
Proper orientation ensures that the valve operates smoothly, and improper positioning can lead to operational problems that may not be immediately noticeable.
Connecting Electrical Wiring Safely and Securely
Solenoid valves rely on electrical signals to function, making correct wiring crucial for proper operation. Here’s how to connect the electrical components:
1. Power Off the System: Always disconnect the power supply before working on any electrical components. This ensures your safety and prevents accidental short circuits.
2. Wire Connection: Typically, solenoid valves come with two or more terminals for electrical connection. Use the appropriate wire gauge according to the solenoid valve specifications.
For AC valves, connect the live wire to the terminal marked “L” and the neutral wire to the terminal marked “N.”
For DC valves, polarity is important. Connect the positive wire to the terminal marked with a “+” sign and the negative wire to the terminal marked with a “-” sign.
3. Use Proper Insulation: Insulate all exposed wiring and terminals with electrical tape or suitable connectors to prevent short circuits. Ensure that no bare wire is exposed to avoid accidental contact.
4. Secure Connections: Tighten the terminal screws or clips securely. Loose wiring connections can cause malfunctions, inconsistent operation, or even damage to the valve.
5. Test the Circuit: After the wiring is complete, use a multimeter to test the connections for continuity and ensure that the solenoid is receiving power as intended.
A secure and correct electrical connection is essential for the solenoid valve’s functionality, so don’t rush this step and double-check the connections.
Testing the Installation for Leaks or Faults
Once the solenoid valve is installed and wired correctly, the next step is to check for leaks or faults. Testing ensures that everything is functioning as expected and prevents costly mistakes down the line:
1. Pressure Test: With the system powered off, check all connection points for leaks. Apply the appropriate pressure to the system and inspect the solenoid valve’s threaded connections and seals. If you find any leaks, tighten the connections or replace damaged seals or gaskets.
2. Electrical Test: Power up the solenoid valve and test its electrical operation. Use a multimeter to check that the valve is receiving the correct voltage. Then, listen for a clicking sound or observe any movement in the valve to confirm it is opening and closing correctly.
3. Leak Detection: You can use soap water to detect small air or gas leaks around the valve connections. Apply the soapy water and watch for bubbles, indicating a leak.
4. Operational Test: Activate the solenoid valve and monitor its performance. Ensure that it responds promptly and accurately to electrical signals. Check that the valve opens and closes fully without obstruction or delays.
Performing thorough leak and electrical tests prevents future complications and ensures the solenoid valve operates smoothly within the system.
Maintenance Tips Post-Installation
Once your solenoid valve is installed and operational, ongoing maintenance is key to extending its lifespan and preventing breakdowns. Here are a few tips to maintain optimal performance:
1. Regular Inspections: Perform regular visual inspections of the valve to ensure there are no signs of wear or corrosion. Check the seals and gaskets periodically and replace them if necessary.
2. Clean the Valve: Keep the valve clean from dirt, dust, and other contaminants. Clean the solenoid coil and other exposed parts to prevent clogging or reduced efficiency.
3. Test the Solenoid Valve: Schedule regular testing of the valve’s electrical components and mechanical parts. This helps detect early signs of failure and ensures that the valve continues to operate correctly.
4. Check for Leaks: Inspect the connections for any signs of leaks, especially after system changes or maintenance. Tighten connections and replace seals if leaks are detected.
5. Lubrication: If your solenoid valve has moving parts, ensure that they are properly lubricated to avoid friction or wear. Follow the manufacturer’s instructions regarding the recommended lubricant.
Regular maintenance ensures the solenoid valve remains in good working condition and helps prevent unnecessary downtime or replacements.
Conclusion
Installing a solenoid valve is a relatively straightforward process, but it requires careful attention to detail to ensure proper function and longevity. By following the right steps—starting with pre-installation checks, correct positioning, secure wiring, and thorough testing—you can ensure that your solenoid valve operates optimally from day one. Regular maintenance after installation will also help you extend the lifespan of the valve and avoid future problems. With the right approach, your solenoid valve will be a reliable component in your fluid and gas control systems for years to come.