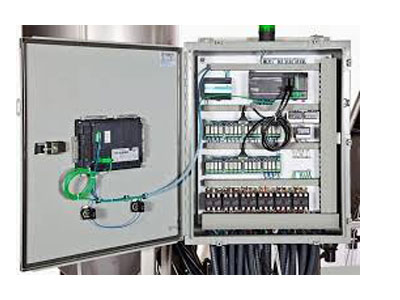
How To Design A Relay Control Panel?
Key Takeaway
Designing a relay control panel involves several key steps. First, plan the layout of the panel, ensuring efficient use of space. Select the necessary components such as relays, switches, and circuit breakers based on the control requirements.
Next, create electrical schematics to outline wiring and connections. Choose an appropriate enclosure that fits all components and protects against dust and moisture. Securely mount the components and perform the wiring, making sure to follow safety standards. After assembly, conduct thorough testing to verify that the system functions correctly and meets safety requirements. Maintain a clean and uniform appearance for ease of maintenance and accessibility. Proper protection ensures the panel is resistant to damage and potential hazards.
Defining the System Requirements
The first step in designing a relay control panel is to clearly define the system’s requirements. This involves understanding the specific application, the load type, voltage, current, and environmental conditions in which the panel will operate. Identify the main objectives of the control panel, such as automated motor control, lighting, or safety systems, to set the foundation for further design.
Key Considerations:
Load Specifications: Determine the voltage and current requirements.
Control Logic: Define the logic for how the relay will activate and deactivate.
Safety Protocols: Ensure that the design meets safety standards and compliance.
Environmental Factors: Consider temperature, humidity, and space constraints.

Selecting Relays and Other Components
Choosing the right relays and additional components is crucial for the functionality of the control panel. Factors to consider when selecting relays include their type (electromechanical or solid-state), voltage ratings, and contact configurations (NO and NC).
Components to Include:
Relays: Select based on current rating, contact configuration, and switching capacity.
Power Supply: Ensure compatibility with the relay voltage and load requirements.
Circuit Breakers and Fuses: For overload and short-circuit protection.
Terminal Blocks and Wiring: Choose based on the complexity of connections.
Control Switches and Indicators: To manage the operation and provide feedback.
Selecting reliable and suitable components will ensure long-term operation and minimize maintenance.
Creating the Circuit Diagram
A detailed circuit diagram serves as a blueprint for building the relay control panel. This step involves mapping out how each component will be interconnected, showing the relay contacts, power sources, and control logic.
Steps for Creating a Circuit Diagram:
Identify Input and Output Points: Label all inputs (e.g., switches, sensors) and outputs (e.g., motors, alarms).
Draw Relay Symbols: Use standardized symbols to represent relay contacts.
Show Power Connections: Ensure correct voltage levels and grounding.
Label Components Clearly: Include part numbers and specifications for easy reference.
A well-drawn circuit diagram helps avoid wiring errors and provides a guide for assembly.
Assembling and Wiring the Panel
With the circuit diagram ready, assembling and wiring the control panel can begin. This step requires careful handling to ensure secure and organized connections.
Steps for Assembly:
Mount Components: Secure relays, terminals, and other devices on the panel.
Wire Connections: Follow the circuit diagram, ensuring all connections are tight and insulated properly.
Label Wires and Components: Use labels for easy identification and future troubleshooting.
Verify Safety Standards: Ensure that the wiring is in compliance with electrical codes.
Proper assembly helps prevent wiring issues and ensures the system operates as designed.
Testing and Validating the Design
Testing and validation are essential to confirm that the relay control panel functions correctly under real conditions. This step involves checking for correct relay operation, verifying connections, and ensuring all safety protocols are met.
Testing Procedures:
Initial Power-Up: Test the system with low power to check for shorts or wiring issues.
Relay Functionality Test: Activate each relay and confirm that the contacts operate as intended.
Load Testing: Simulate actual loads to verify performance under operating conditions.
Safety Checks: Ensure that safety systems like circuit breakers and fuses respond correctly.
Validation Checklist:
Confirm voltage and current levels match specifications.
Ensure that the control logic functions as designed.
Double-check the operation of all inputs and outputs.
Conclusion
Designing a relay control panel requires meticulous planning, selecting the right components, and thorough testing to ensure reliable operation. By defining system requirements, choosing suitable relays and parts, creating precise circuit diagrams, and performing detailed assembly and testing, engineers can create effective control panels that meet safety standards and operational needs. Proper planning and validation ensure long-term performance, minimizing downtime and optimizing control system efficiency.

