How To Adjust Water Pressure With A Pressure Switch?
Key Takeaway
Adjusting water pressure involves modifying the pressure switch settings. Locate the adjustment screws on the switch cover. The larger screw controls both cut-in and cut-out pressure.
Turn the screw clockwise to increase water pressure and counterclockwise to decrease it. Test the pressure using a gauge to ensure it meets your needs. Always switch off the power before adjusting.
Importance of Adjusting Water Pressure
Adjusting water pressure is a crucial aspect of maintaining an efficient and safe plumbing system. Proper water pressure ensures that fixtures and appliances function optimally without causing undue stress or damage. Excessively high pressure can lead to leaks and burst pipes, while low pressure can affect the performance of showers and faucets.
Regular adjustment and monitoring of water pressure help in prolonging the lifespan of plumbing systems and reducing repair costs. Ensuring that water pressure remains within recommended limits enhances the comfort and convenience of daily water usage. Understanding the importance of water pressure adjustments can significantly impact water conservation efforts and energy efficiency in homes and commercial buildings.
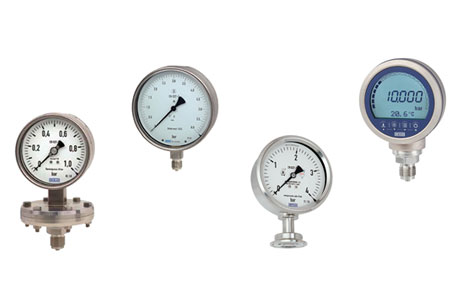
Tools Needed for Adjustment
Before adjusting the water pressure using a pressure switch, you’ll need a few essential tools:
1. Pressure Gauge: To measure the current water pressure, attach a pressure gauge to the system. It provides an accurate reading of the pressure levels.
2. Wrench or Screwdriver: Most pressure switches have adjustment screws that require either a wrench or screwdriver to modify the setpoints. Ensure you have the appropriate tool for the job.
3. Pliers: Pliers may be needed to adjust the nuts or remove the switch from its mounting if necessary.
4. Manometer: For more precise pressure measurements, you can use a manometer to get an accurate reading of the pressure in the system.
5. Sealant Tape: If you need to disconnect or reconnect the pressure switch, use sealing tape to prevent leaks during the process.
These tools will ensure you can adjust the pressure switch effectively and avoid mistakes during the process. Having everything ready beforehand can save time and help you work more efficiently.
Steps to Adjust Pressure Using a Pressure Switch
Adjusting the water pressure using a pressure switch is straightforward if you follow these steps:
1. Turn Off the Power: Safety is always the first step. Ensure the power to the water system is turned off to prevent accidents during adjustment.
2. Check the Current Pressure: Attach a pressure gauge to the system and check the current pressure. This will give you a baseline to compare against the new pressure settings.
3. Locate the Pressure Switch: Find the pressure switch in the water system. It is usually located near the pump or water tank. Depending on the model, it may have a cover that you need to remove.
4. Identify the Adjustment Screws: Most pressure switches have two screws for adjusting the cut-in and cut-out pressures. The cut-in pressure is the point at which the pump turns on when pressure falls too low. The cut-out pressure is when the pump turns off once the pressure rises to the desired level.
5. Adjust the Setpoints: Use the appropriate tool to turn the adjustment screws. If the pressure is too low, increase the cut-in and cut-out pressures by turning the screws clockwise. If the pressure is too high, lower the settings by turning the screws counterclockwise.
6. Reassemble and Power the System: After adjustments are made, securely fasten everything back together and restore power to the system. Turn on the water system and observe its performance.
7. Fine-Tune if Necessary: It may take a few adjustments to get the perfect water pressure. Make small changes and test repeatedly to ensure accuracy.
By following these steps, you’ll have successfully adjusted your water pressure to the optimal setting.
Testing the Adjusted Pressure Levels
Once you’ve adjusted the pressure switch, it’s time to test the new pressure levels to ensure everything is working correctly. Here’s how:
1. Turn On the Water System: Restore power and turn on the water system to allow the pressure switch to begin its cycle. Observe the system as it starts to operate, ensuring that the pump activates when the pressure falls below the cut-in level and shuts off once it hits the cut-out pressure.
2. Monitor the Pressure: Use a pressure gauge to continuously monitor the pressure while the system operates. Check to see that the pressure reaches the adjusted setpoints without exceeding or falling below the desired range.
3. Check for Smooth Cycling: The switch should allow the pump to cycle smoothly between the cut-in and cut-out pressures. If the cycling is erratic or the pressure fluctuates too much, you may need to adjust the differential between the cut-in and cut-out pressures.
4. Observe the System Over Time: Let the system run for a while to ensure the pressure remains stable. If the system behaves correctly and the pressure stays within the desired range, the adjustment is successful.
Testing ensures that the adjustments you’ve made are accurate, providing the ideal water pressure for your system. If you notice any issues, you can go back and fine-tune the settings.
Common Mistakes to Avoid During Adjustment
When adjusting the pressure switch, avoid these common mistakes to ensure the process goes smoothly:
1. Ignoring the Power Supply: Always turn off the power before making adjustments. Failing to do so can result in electrical accidents or damage to the equipment.
2. Not Using the Right Tools: Ensure you use the correct tools to adjust the pressure switch. Using improper tools can damage the switch or lead to inaccurate adjustments.
3. Making Large Adjustments: It’s tempting to make large adjustments, but small changes are often more effective. Gradual adjustments allow for more precise control and help you avoid overcorrecting.
4. Not Testing the System: Always test the system after making adjustments. If you skip this step, you risk not identifying potential issues, such as incorrect pressure readings or faulty operation.
5. Neglecting the Differential Setting: The differential setting is just as important as the cut-in and cut-out pressures. If this isn’t adjusted properly, the switch may cycle too frequently, causing unnecessary wear on the system.
6. Overlooking Leaks: After adjusting, check for leaks in the system, especially around the pressure switch. Leaks can cause pressure irregularities and affect the accuracy of your settings.
Avoiding these mistakes ensures that you can adjust the water pressure accurately, preventing system failures or inefficiencies in the long run.
Conclusion
Adjusting water pressure with a pressure switch involves several key steps to ensure optimal performance. First, identify the current pressure settings and determine the desired pressure range for your application. It is essential to consider factors such as system capacity and environmental conditions that may affect water pressure.
Once the desired settings are established, carefully adjust the pressure switch by turning the adjustment screws, typically located on the switch’s housing. Regular monitoring and maintenance are necessary to ensure the adjusted settings remain consistent, avoiding fluctuations that could impact system efficiency.